
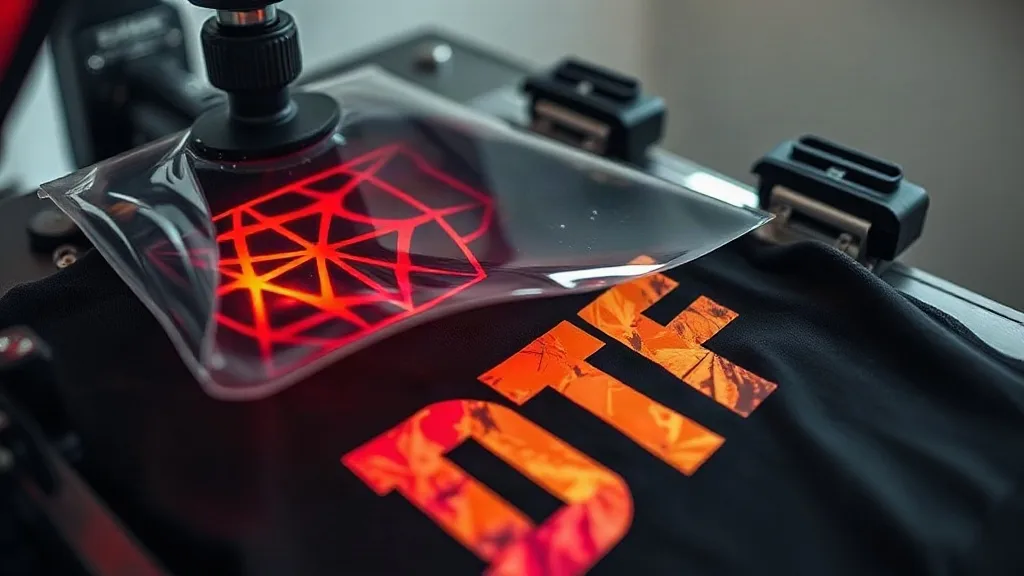
If you've been in the custom apparel game for even a short while, you've likely heard the buzz around dtf printing. It's not just another trend; it's a genuine shift in how we think about decorating fabric. Unlike methods that lock you into specific materials or require costly setup, dtf transfers offer a versatile, durable, and surprisingly accessible way to bring designs to life. Whether you're a hobbyist with a heat press in your garage or a commercial shop looking to expand your offerings, understanding DTF technology can open up new creative and business possibilities.
In this guide, we'll walk through the entire DTF process, from the science behind the film to the nitty-gritty of application. We'll also compare it to other decoration methods, share troubleshooting tips, and answer common questions. By the end, you'll have a clear picture of why DTF has become a go-to solution for so many printers.
What Exactly Is DTF Printing?
DTF stands for Direct-to-Film. At its core, it's a printing method where your design is printed onto a special PET film using water-based inks, then coated with a thermoplastic adhesive powder. The film is cured, and later, when you're ready to apply it, you use a heat press to transfer the design onto fabric. The magic lies in that adhesive powder: it melts under heat, bonding the ink to the fabric fibers while the film peels away cleanly.
Unlike DTG (Direct-to-Garment), which prints directly onto the shirt, DTF decouples printing from application. That means you can print transfers in bulk, store them, and apply them on demand. It also means you can decorate items that don't fit on a DTG platen, like sleeves, hoodies, and even odd-shaped items. The process works on a wide range of fabrics, including cotton, polyester, blends, and even leather, without the need for pre-treatment.
Why DTF Transfers Are Gaining Popularity
Several factors have fueled the rise of DTF. First, there's the cost. Unlike screen printing, which requires separate screens for each color, DTF is a digital process. You can print full-color, photographic designs with no setup fees. That makes short runs and one-offs economically viable. Second, the durability is impressive. When applied correctly, DTF prints withstand dozens of washes without cracking, fading, or peeling. Third, the color vibrancy is outstanding. The inks sit on top of the fabric, so whites are bright and colors pop, even on dark garments.
Another advantage is the ability to print on demand. You can produce a single transfer or a thousand, scaling easily with your needs. This flexibility is a game-changer for small businesses and artists who want to test designs without committing to large inventories.
How to Apply DTF Transfers: A Step-by-Step Guide
Applying a DTF transfer is straightforward, but attention to detail makes all the difference. Here's a reliable process that works for most fabrics.
Step 1: Prepare Your Workspace
You'll need a heat press (or an iron with consistent pressure), a lint roller, and a protective sheet or parchment paper. Set your heat press to the temperature recommended by your transfer supplier, typically around 300°F to 325°F (150°C to 160°C). Pre-press the garment for a few seconds to remove moisture and wrinkles. This step is often overlooked but crucial for a smooth finish.
Step 2: Position the Transfer
Place the DTF transfer on the garment with the printed side facing up. The adhesive powder is on the back of the film, so it will be in contact with the fabric. Use heat-resistant tape if needed to keep it in place.
Step 3: Press
Apply medium to firm pressure for 10 to 15 seconds. The exact time can vary based on your press and the transfer, so always test with a scrap piece first. After pressing, peel the film while it's still warm (warm peel) or let it cool completely (cold peel), depending on the film type. Most modern DTF films are cold peel, but check your supplier's instructions.
Step 4: Post-Press (Optional)
For extra durability, especially on stretchy fabrics, you can cover the design with a sheet and press again for 5 to 10 seconds. This helps the adhesive fully set.
Choosing the Right DTF Transfer for Your Project
Not all DTF transfers are created equal. Factors like ink quality, film thickness, and adhesive powder grade affect the final result. When sourcing transfers, look for ones that specify compatibility with your fabric type. For example, transfers designed for cotton may not adhere as well to nylon. Also, consider the size and detail of your design. DTF excels at fine details and gradients, so intricate artwork is no problem.
If you're printing your own transfers, invest in a good printer, quality inks, and reliable powder. The learning curve is manageable, but consistency comes from using the same materials and settings.
DTF vs. Other Printing Methods
How does DTF stack up against screen printing, DTG, and vinyl? Here's a quick comparison:
- Screen Printing: Best for large orders of simple designs. High setup costs, limited colors unless you pay for more screens. DTF wins for short runs and complex art.
- DTG: Great for cotton, but requires pre-treatment and can be finicky on blends. DTF works on more fabrics and often has better wash durability.
- Heat Transfer Vinyl (HTV): Good for simple shapes and text, but layering multiple colors is time-consuming. DTF handles full-color designs in one press.
Ultimately, DTF shines when you need versatility, vibrant colors, and low minimums.
Common DTF Problems and How to Fix Them
Even with a solid process, issues can arise. Here are a few common ones and their solutions:
- Transfer peels off after washing: Usually due to insufficient pressure, temperature, or time. Increase one or more and ensure the fabric is clean.
- Cracking: Often caused by over-stretching the garment during application or using too high a temperature. Lower the temp slightly and avoid stretching.
- Dull colors: Might be from under-curing the ink or using low-quality transfers. Try a different supplier or adjust your curing settings.
Always test on a scrap garment before running a full batch.
Fabric Compatibility: What Works Best?
One of DTF's biggest selling points is its wide fabric compatibility. It adheres well to:
- 100% cotton
- Polyester and cotton-poly blends
- Nylon (with some care)
- Leather and faux leather
- Canvas and denim
For stretchy fabrics like spandex, use a transfer with a stretchable adhesive to prevent cracking. Always test first.
Frequently Asked Questions About DTF Transfers
How long do DTF transfers last?
When applied correctly, DTF prints can last 50 washes or more without significant fading or cracking. Following care instructions like washing inside out in cold water and avoiding bleach will extend their life.
Can I use DTF transfers on dark shirts?
Absolutely. DTF prints include a white ink layer that makes colors pop on dark fabrics. You don't need a separate white underbase like with DTG.
Do I need a heat press for DTF transfers?
A heat press is highly recommended for consistent results. However, a home iron can work in a pinch if you apply firm pressure and avoid steam. Just be aware that results may vary.
Are DTF transfers safe for children's clothing?
Yes, as long as the inks and adhesives are non-toxic and comply with safety standards. Check with your supplier for certifications like CPSIA.
Can I layer DTF transfers?
Layering is possible but tricky. It's better to print a single transfer with all elements combined. If you must layer, press the bottom layer first, then apply the top layer.
DTF technology continues to evolve, and with a bit of practice, you can achieve professional-looking results on almost any fabric. Whether you're decorating team jerseys, custom t-shirts, or promotional items, DTF transfers offer a reliable, cost-effective solution that keeps customers coming back.