
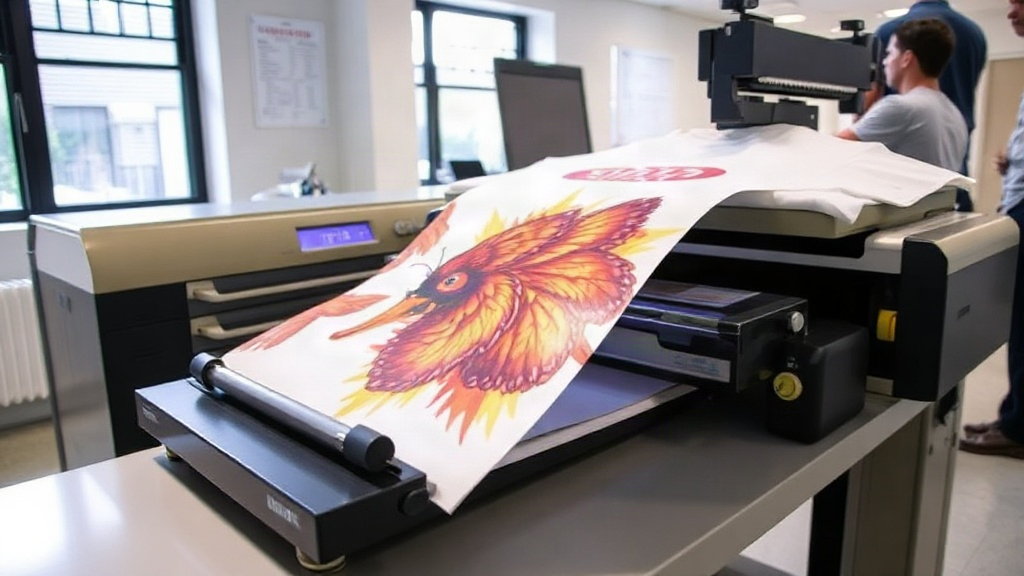
If you've been exploring custom apparel printing, you've likely encountered DTF printing. Short for Direct-to-Film, this technology is quickly becoming a favorite among hobbyists and professionals alike. Unlike traditional methods that require specialized equipment or messy processes, DTF offers a streamlined way to transfer detailed designs onto various fabrics. In this guide, we'll walk you through everything you need to know to get started with DTF printing, from the basics to pro tips.
DTF printing is a digital printing method where your design is printed onto a special film, coated with a powder adhesive, and then heat-pressed onto the fabric. This process allows for full-color, high-detail prints on cotton, polyester, blends, and even dark materials without the need for weeding or layering. It's a game-changer for small businesses and DIY enthusiasts looking to create professional-grade custom items.
What Exactly Is DTF Printing?
Direct-to-Film printing involves printing your artwork onto a PET film using specialized DTF inks. After printing, a thermoplastic powder is applied to the wet ink, which acts as an adhesive when heated. The film is then cured, and once ready, it can be heat-pressed onto a garment. The result is a durable, stretchable print that feels soft to the touch.
The key difference between DTF and DTG (Direct-to-Garment) is that DTF doesn't print directly onto the fabric; instead, it transfers from a film. This allows for greater versatility in fabric types and colors. Unlike screen printing, DTF doesn't require separate screens for each color, making it cost-effective for small batches and complex designs.
Why Choose DTF Printing?
There are several compelling reasons to consider DTF printing for your next project:
- Versatility: Works on a wide range of fabrics, including cotton, polyester, nylon, and even leather. It's also effective on dark and light garments.
- Detail and Color: DTF can reproduce intricate details, gradients, and photographic images with vibrant colors.
- No Weeding: Unlike vinyl cutting, there's no tedious weeding process. You simply print, powder, cure, and press.
- Durability: When applied correctly, DTF prints withstand repeated washing without cracking or fading.
- Cost-Effective for Short Runs: No minimum order quantities, making it ideal for one-off items or small batches.
These advantages make DTF a top choice for custom t-shirts, hoodies, tote bags, and more. Whether you're a small business owner or a DIY enthusiast, DTF opens up a world of possibilities.
Getting Started with DTF Printing
To begin your DTF journey, you'll need a few essential tools and supplies. Here's a breakdown of what you'll need and how to set up your workflow.
Essential Equipment and Materials
- DTF Printer: A dedicated DTF printer or a converted inkjet printer with DTF ink. Popular models include those from Epson and Roland.
- DTF Ink: Specialized pigment inks designed for DTF printing. These are different from regular inkjet inks.
- PET Film: The transfer film that holds the printed design. Available in rolls or sheets.
- DTF Powder: Thermoplastic adhesive powder that bonds the ink to the fabric.
- Heat Press: A reliable heat press capable of reaching 325°F (160°C) and applying consistent pressure.
- Curing Oven or Heat Gun: To melt the powder after application.
- Design Software: Any graphic design software like Adobe Photoshop, Illustrator, or free alternatives like GIMP or Inkscape.
Once you have your equipment, you'll need to set up a dedicated workspace with good ventilation. DTF printing involves chemicals and heat, so safety first!
Step-by-Step DTF Printing Process
- Create Your Design: Prepare your artwork in CMYK color mode, and mirror the image horizontally. This ensures the text reads correctly after transfer.
- Print on Film: Load the PET film into your printer and print the design. Ensure the printer is set to the correct DTF profile for optimal ink laydown.
- Apply Powder: While the ink is still wet, sprinkle DTF powder evenly over the printed area. Shake off excess powder.
- Cure the Powder: Place the film in a curing oven or use a heat gun to melt the powder until it becomes glossy. This usually takes about 2-3 minutes at 320°F (160°C).
- Heat Press: Preheat your heat press to 325°F (160°C). Place the cured film on your garment with the powder side down. Press for 15-20 seconds with medium pressure.
- Peel and Finish: Allow the transfer to cool completely before peeling off the film. For a matte finish, peel while hot; for glossy, peel cold. Then, press again for 5-10 seconds to set the print.
With practice, this process becomes second nature. The key is to maintain consistent temperature, pressure, and timing.
Tips for Perfect DTF Transfers
- Pre-press Your Garment: This removes moisture and wrinkles, ensuring a smooth surface for the transfer.
- Use Quality Supplies: Cheap film or powder can lead to poor adhesion and faded prints. Invest in reputable brands.
- Test Your Settings: Different fabrics may require slight adjustments in temperature and pressure. Always do a test press on a scrap piece.
- Store Films Properly: Keep unused film in a cool, dry place to prevent curling or static buildup.
- Clean Your Printer: Regular maintenance prevents clogged nozzles and ensures consistent prints.
Common DTF Printing Challenges and Solutions
Even with the best equipment, you might encounter issues. Here are some common problems and how to fix them:
- Faded or Patchy Prints: This often indicates insufficient powder or uneven curing. Ensure the powder covers all ink and is fully melted.
- Poor Adhesion: If the transfer peels off, try increasing the pressure or temperature during heat press. Also, ensure the garment is clean and dry.
- Cracking: Over-stretching the garment after printing can cause cracks. Use a stretchable DTF powder and avoid excessive stretching.
- Color Shifting: This can happen if the ink is not properly cured. Check your curing time and temperature.
By troubleshooting systematically, you'll quickly overcome these hurdles.
Frequently Asked Questions About DTF Printing
Can I use DTF printing on dark-colored shirts?
Absolutely! DTF printing works exceptionally well on dark fabrics because the white ink layer in the DTF ink set provides a base for vibrant colors. Unlike DTG, which may require a white underbase, DTF already includes white ink in the print, so colors pop on any background.
How durable is DTF printing compared to screen printing?
When properly applied, DTF prints are highly durable and can withstand 50+ washes without significant fading or cracking. Screen printing may last longer on high-wear items, but DTF is more versatile and cost-effective for small runs. The key is to follow correct heat press and curing procedures.
What fabrics can I use with DTF printing?
DTF printing adheres well to cotton, polyester, cotton-poly blends, nylon, and even leather. It's not recommended for fabrics with heavy coatings or waterproof treatments, as the adhesive may not bond properly. Always test on a swatch first.
Do I need a special printer for DTF printing?
You can use a dedicated DTF printer or convert a standard inkjet printer (like certain Epson models) with DTF ink and a film feeding system. However, dedicated DTF printers are optimized for the process and often yield better results with less maintenance.
How much does it cost to start DTF printing?
Initial investment can range from $500 for a basic converted printer setup to $5,000+ for a commercial-grade DTF printer. Ongoing costs include ink, film, powder, and maintenance. For hobbyists, a starter kit is a cost-effective way to begin.
Final Thoughts
DTF printing is a versatile and accessible method for creating custom apparel. With the right knowledge and equipment, you can produce professional-quality prints from the comfort of your home or studio. Whether you're starting a business or making personalized gifts, DTF offers endless creative possibilities. Remember to practice, experiment with settings, and source quality supplies. Happy printing!